Thursday, December 29, 2016

Art Deco Style 3 Hole Beaded Chain Ceiling Light Fixtures

Most of this blog is dedicated to lamp repair but we can spend time appreciating styles and design in vintage and antique lighting. From pan light to pole light, there is no shortage of styles and some past the test of time better than others. Most of our repairs involve the switch, plug, or cord set. Often the lamp has a broken glass shade or glass body. As with any rule, there is an exception and for lighting repair that exception comes from the 3 Hole Ceiling Light Fixture.


The 3 Hole Ceiling Fixture is one of the simplest designs for ceiling lighting with maximum decoration. Hundreds of styles were made with different patterns and colors. Some shades are frosted and others are painted. Most 3 Hole panel shades have sections of clear glass for dramatic effect when the light shows through. They all connected to the fixture the same way: three holes in the glass for a beaded chain.


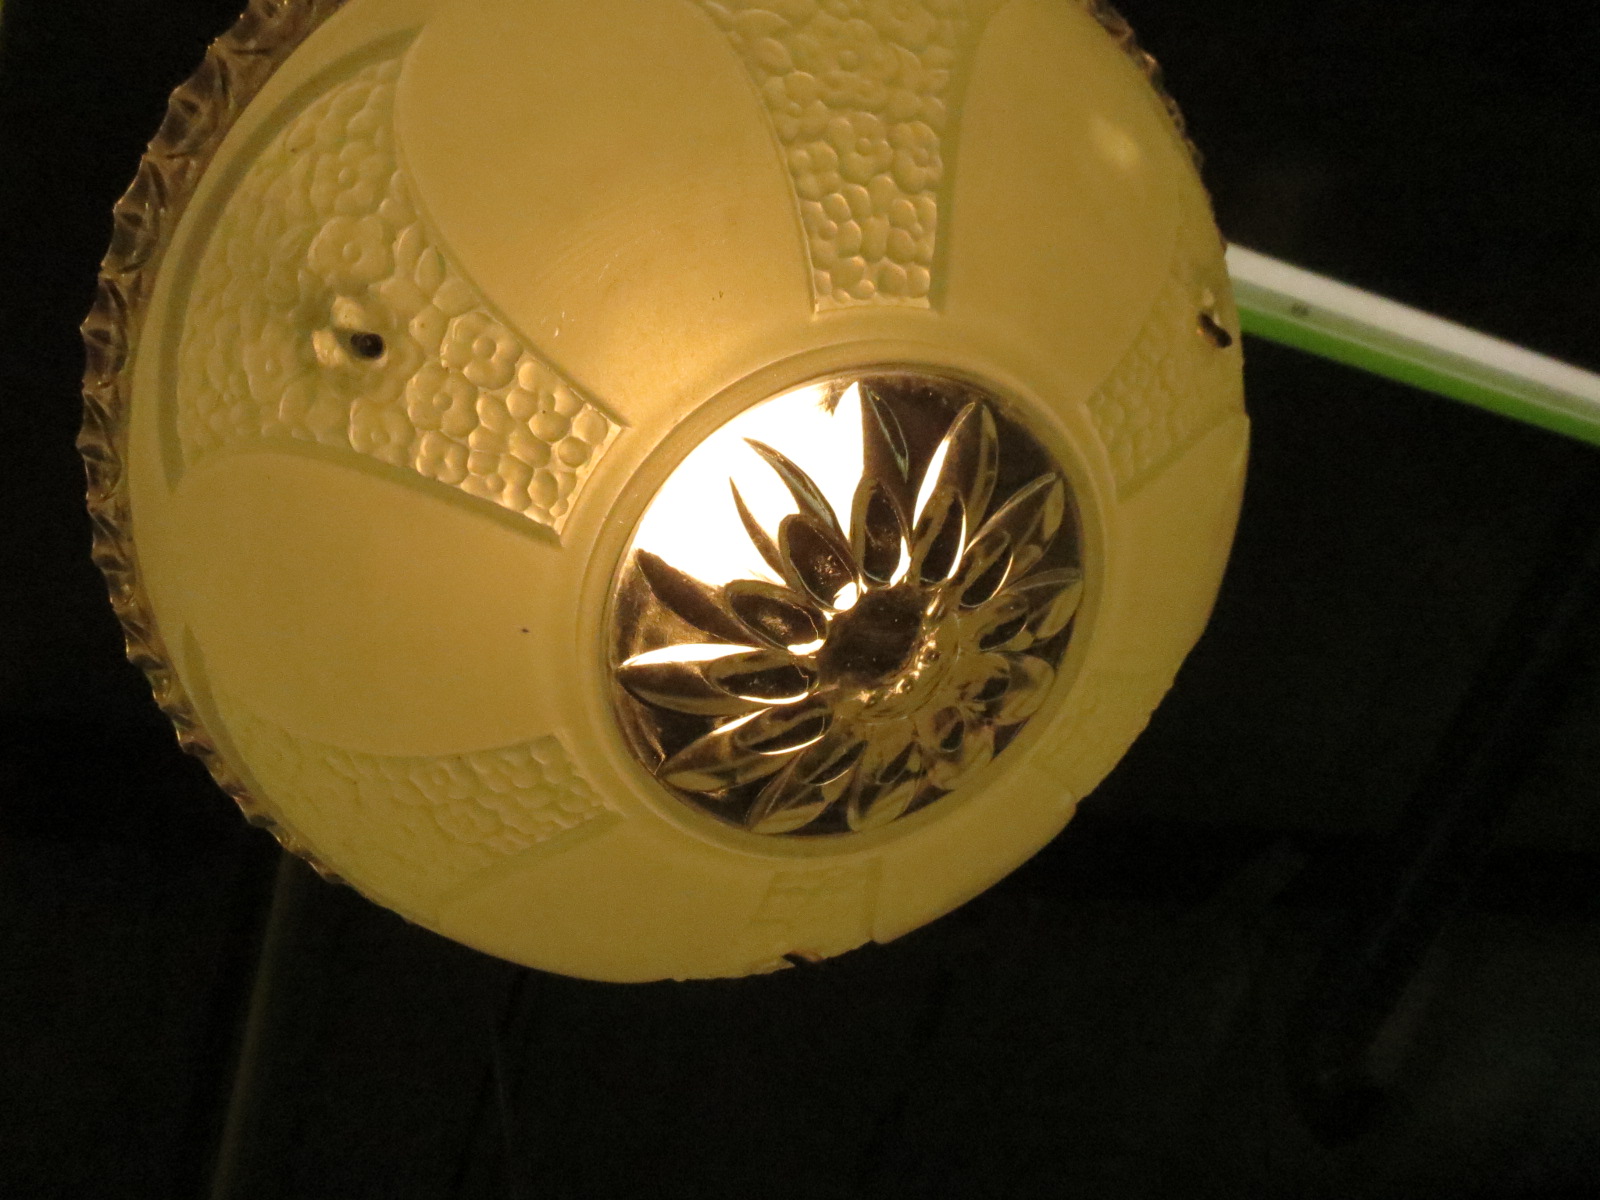
An advantage of the 3 Hole Ceiling Fixture is the short parts list: canopy, neck, socket, holder, wires, crossbar, screws, beaded chain, and shade. Fewer parts means less room for error or for things to get broken. Also the shades are usually made from really thick and heavy glass. They are manufactured by either spinning or pressing the molten glass in a mold. Spun glass will have a smooth inside and pressed glass might have some textured glass on the inside of the shade.


The history of the beaded chain fixture is not really clear. Like most designs in the lighting industry there are no brands associated with the fixtures, just a style and a design. One thing is clear, these fixtures were never designed for oil, kerosene or gas lamps. That dates this style back to the early electric age of the 1920's to 1940's.

With the change in consumer taste and style choices the Beaded Chain Fixture was replaced with new modern fixtures. Often the old fixture is dismantled, discarded, and in disarray but the 3 Hole Fixture was the exception. The glass shade was removed intact. Most likely made it's way to the garage, attic or yard sale stack.

Beaded chain fixtures can be purchased from a lighting store without the glass. A quick search on eBay turned up over 300 shades for the 3 Hole Ceiling Fixture with prices ranging from $7 to $185. Next time you are looking for an authentic vintage lighting solution and would like to keep the costs in check, the 3 Hole Ceiling Fixture is a definite contender.


Wednesday, November 30, 2016

Jack Daniels Bottle Makes a Nice Man Cave or Rec. Room Lamp

We have made lamps for customers out of many things: antique candy tins, cowboy boots, firearms, porcelain animals. Now we can add liquor bottle to the list. A guy in our shop said he had an over-sized Jack Daniel's bottle he had been working on for some time. It was now empty and he wanted to make a lamp out of it. Something that would fit in a game room or man cave type room. We came up with an idea to put some recycled LED Christmas lights in the bottle and use a 3 terminal socket to power the lamp.

Important note: We first attempted this project with traditional incandescent Christmas lights and they were getting too hot inside the bottle. We had to switch to LED lights for the heat to be reduced. Do not use traditional Christmas light bulb in a confined space like this bottle. 


Since we are building this lamp and not repairing, we will need most new lamp parts. Instead of buying separate pieces, we just used the nickel turn knob make a lamp kit. It comes with a 3 way socket, cord, nipple, nut, neck harp and harp base (most everything you need to build a lamp). For our project, we need a 3 terminal interior socket, so we add that to the list. We will also need to modify the socket cap with a side outlet. So we punch a hole in the socket cap and add a bushing to the hole.


3 Terminal Socket

Snap in bushing

First, we start by washing out the bottle. Rinse, soap, repeat. This was a container for liquid and we need it to be clean and dry. Next, we start stuffing the LED Christmas lights into the bottle. The plug goes first. It had to be trimmed to fit in the hole.


Using a dowel, we continue stuffing the lights into the bottle.


Now we can see what the lights will look like.


This bottle will serve as our lamp body. Next, we attach the socket to the lamp. For this bottle, we are reusing the cap. There is enough space for our threaded rod and nut. The cap closes tight enough to hold the socket, harp, and shade in place. We start by drilling a 3/8 inch hole in the middle of the cap.


Now we add the hardware to the cap.


Now we are ready to start wiring the socket. The wires from our cord set will come in from the side outlet hole in the socket cap. The wires from the LED Christmas lights will pass through the threaded rod to the socket interior. Tie a UL knot in both the cord set and the LED Christmas light sets.


Next, we connect the wires to the socket interior. Starting with the wires from the cord set, the ribbed wire connects to the nickel screw and the smooth wire connects to the brass screw. On the LED Christmas light wires, one wire connects to the black screw on the socket and the other wire connects to the nickel screw (nickel screw has two wires around it 1 from the cord set and 1 from the LED Christmas lights).


The cords are pushed back into the lamp and pulled out the side of the socket so the socket interior can set properly in the cap and shell. The socket shell slides over the socket interior and is snapped into the socket cap.


Pull up on the socket shell to make sure it is firmly seated in the cap. Now we are ready to add a bulb and test the lamp.


We top it off with a parchment color mica shade.


Lamp complete. Total time < 1 hour Total cost < $20.00