Showing posts with label 3 way socket. Show all posts

Friday, August 24, 2018

Repair Table Lamp Socket

Sometimes the table lamp quits working. After a few bulbs, you realize it need more that just a bulb. In this video we demonstrate how easy repairing a socket can be. Not all repairs and lamps are the same.


The socket interior used in this video is a 3-way turn knob interior.

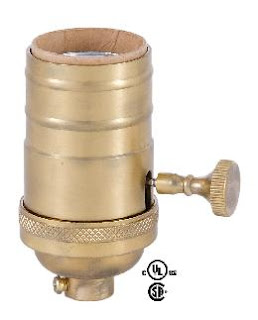
48207i - 3-Way turn-knob medium base E26 lamp socket interior for 3-Way bulbs, short mandrel, 250W- 250V

Friday, December 15, 2017

Not So Obvious Lamp Repair

In this technological world of automation and instant results, some basic steps can easily be overlooked. Combine that with the disposable product mentality and you can find yourself thinking "I just need a new one." Even in the world of lamp repair, a non working lamp can easily frustrate any mild tempered person. That is why the inspection is so important.

Every repair mentioned on this blog starts with an inspection. Repairs can be symptom based (not working) or desire based (want a different color socket), but every repair should start with a thorough inspection. A customer brought in a lamp the other day and complained it wasn't working.


Like every repair, we start with an inspection. First, we look at the lamp from top to bottom.


Next, we add a bulb and plug it in.


Now we test the bulb and socket.


Turns out this lamp only needed a bulb replacement.

Total time < 30 seconds. Total cost < $20 (3-way bulb)

Light bulb jokes!

Q:  How many bureaucrats does it take to screw in a light bulb?
A:  Two. One to assure that everything possible is being done while the other screws the bulb into the water faucet.

Q: How many Psychiatrists does it take to change a light bulb?
A: Only one, but the bulb has got to really WANT to change.

Credit to a University Of Maryland do-gooder.

Thursday, March 30, 2017

Heavy Socket With Collar Repair

In this blog we have covered many socket repairs. The latest "technology" in lamp sockets is the screw collar style socket that connects the socket cap to the socket shell.

48243SB - 3-Way, Turned Brass Lamp Socket (E26)

It is a good looking socket and can cost some real money to replace. We are all about being green and saving green so we will repair when it is an option. The other day a customer brought in this newer lamp with a screw collar type socket. They complained it stopped working and needed repair.


It looks good. No burns or worn places. The cord is polarized and in good shape. The only lamp part we can find wrong is the socket turn knob does not click. It just spins. Something inside the mechanical function of the socket has stopped working. We are going to fix this lamp, but only replace what is broken and not a penny more.

Most sockets snap together and have a PRESS marked on the socket shell to pry it from the socket cap. These sockets are a bit easier since they have a threaded collar connecting the cap and shell.

First, make sure the lamp is unplugged. Remove the harp from the harp base by pulling up the locking couplings and squeezing the tines together.


Then unscrew the collar on the socket. The collar hangs on the harp base while the socket shell is removed.


Pull the socket interior out from the socket cap. You might have to pull some slack from the cord or push extra cord up from the base. Unscrew the terminals holding the wire to the socket interior. (Some lamps might have a quick connect type socket interior. The wires on a quick connect should be cut close to the socket interior.) Remove the old worn socket interior.


Next, the new interior goes on the same way the old one came out. Simply revers the order of removal. The socket interior we are putting in this socket is a three-way socket to use with either 3-way bulbs or standard on/off bulbs.


Remember to properly connect the wires, the smooth wire connects to the brass screw and the ribbed wire connects to the nickel screw. If you pulled any slack up the socket for the interior, you will need to pull it back down the lamp. The harp is squeezed band clips back in the harp base.


Viola!! Complete repair in < 10 minutes  and costs < $

Wednesday, July 20, 2016

Vintage Alabaster Marble Urn Lamp Repaired With Finial

I often wonder if lamps were around centuries ago would we have marble lamps carved by Michelangelo. It is an original medium, and whenever I see a carved marble lamp I instantly think it's a piece of art. Of coarse art is relative and not what this blog was designed to discuss so.... let's get back to business: lamp repair.

A customer brought in this vintage alabaster marble urn lamp in need of a repair. It didn't have a plug or barely a lamp cord. They said they wanted it renewed so we were going to rewire with a new socket, plug, cord set, harp and harp base. We will reuse any parts worth saving.


We begin the checking the lamp for any major defects and making a list of the lamp parts we will need to make the project complete. For this alabaster urn lamp we will need a new lamp cord, antique brass socket, antique brass harp and harp base.


We will need to remove the old socket from the lamp. Using a small flat head screwdriver we pry the socket shell from the socket cap.


Someone has been here before and removed the old lamp cord from the socket interior. Next, we remove the old socket cap. With no set screw, the old socket cap just unscrews from the lamp's threaded rod.


The old threaded rod is a little rusty. It is not worth replacing yet, so we use a wire brush to clean up the threads on the top.


Now is a good time to thoroughly clean the lamp body and remove any debris on the lamp. In this case, debris includes some old lamp cord. 


Now we are ready to start the rewiring. First, we push out new lamp cord from the bottom of the lamp to the top. 


Then, the harp base and the new socket cap go on the lamp. The new socket cap had a retaining ring for the socket shell and a set screw for the threaded rod. If a socket cap does not have a set screw, a lock washer is suggested. 


Next, we tie a UL knot in the lamp cord and attach the socket interior. The smooth lamp cord connects to the brass screw terminal and the ribbed cord connects to the nickel terminal. 


The lamp cord slack is pulled back down the lamp body so the socket interior sets on the socket cap. The new socket shell slips over the socket interior and is attached with the retaining ring. 


Next, we attached the new harp to the harp base. This lamp had an old finial on the old harp so we will simply unscrew it from the old harp, and screw on the new harp without any problem. Note: Lamp harps have standard tops threaded 1/4-27. Most finials have the same thread pattern so you can easily remove a finial from one harp to another. 


Harps are installed by lifting the locks up the harp and squeezing the tines to fit in the harp base. They should fit snug but flush with the harp base. If the harp is not seating correctly, try adjusting the harp base with some pliers. The locks should slide all the way down and over the top of the harp base. 


Finally, we add a bulb and test the lamp. 


Great. Total Cost < $ 30 Total Time < 45 minutes