Showing posts with label socket repair. Show all posts

Friday, August 11, 2017

Hanging Lamp from Antique Carriage Singletree

Customers often bring in sentimental (and non-sentimental) items to make into lamps. The other day a customer brought in this antique carriage part that we later identified as a singletree.


It was in good shape. They said they wanted to turn it into a 3 light hanging lamp with simple lines and design. We brainstormed for a few moments and came up with a list of needed lamp parts to make this possible. Part of our goal is to not modify the singletree in any way.

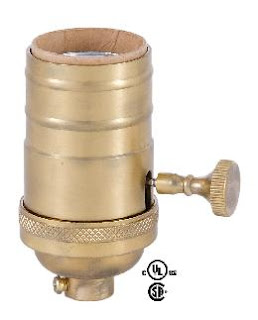
3 - Antique Brass Sockets


3 - Antique Brass Loops

1 -  Antique brass hook for center socket

3- 1/2" threaded rods
1/8IP Hex Nut

1/8IP Locking Washer

6 foot of chain

12 inches of double jack black chain

12 foot of SPT-1 brown cord

2 Zinc Plated Pin-up Bracket (we'll explain)
Modern Style Screw Collar Canopy

First, we wire all three sockets and attach the loops on the threaded rods. The two side sockets use 4 1/2 feet of cord and the middle socket uses the other 3 feet of cord (12 foot total). Remember the smooth wire connects to the brass screw terminal and to tie a UL knot in the cord below the socket interior.


The tow ends of the singletree have hooks for our socket loops. We will need to install a loop in the middle of the singletree for our middle socket. Using the zinc pin-up brackets, we make a bracket to hold our hook and fasten it to the already made holes in the singletree.


Next, we hang the sockets on the hooks add the chain and route the cord up the chain to the canopy.


The smaller double jack chain is used to hold the large decorative chain to the outer brackets and to hold all three chains together in the middle of the fixture.


The canopy is connected to the center chain and the cords are pushed up the screw collar loop hole.


The customer wanted to use the bare Edison bulb look for the lights. For testing we added 3 over-sized Edison bulbs for a large dramatic effect.


Perfect. This fixture is ready for a rustic dining room or over a bar. We were able to keep the singletree completely intact with no new holes or other modifications.

Total time < 2.5 hours Total Cost < $60.00 (price can vary depending on the style of chain and canopy used).

Thursday, March 30, 2017

Heavy Socket With Collar Repair

In this blog we have covered many socket repairs. The latest "technology" in lamp sockets is the screw collar style socket that connects the socket cap to the socket shell.

48243SB - 3-Way, Turned Brass Lamp Socket (E26)

It is a good looking socket and can cost some real money to replace. We are all about being green and saving green so we will repair when it is an option. The other day a customer brought in this newer lamp with a screw collar type socket. They complained it stopped working and needed repair.


It looks good. No burns or worn places. The cord is polarized and in good shape. The only lamp part we can find wrong is the socket turn knob does not click. It just spins. Something inside the mechanical function of the socket has stopped working. We are going to fix this lamp, but only replace what is broken and not a penny more.

Most sockets snap together and have a PRESS marked on the socket shell to pry it from the socket cap. These sockets are a bit easier since they have a threaded collar connecting the cap and shell.

First, make sure the lamp is unplugged. Remove the harp from the harp base by pulling up the locking couplings and squeezing the tines together.


Then unscrew the collar on the socket. The collar hangs on the harp base while the socket shell is removed.


Pull the socket interior out from the socket cap. You might have to pull some slack from the cord or push extra cord up from the base. Unscrew the terminals holding the wire to the socket interior. (Some lamps might have a quick connect type socket interior. The wires on a quick connect should be cut close to the socket interior.) Remove the old worn socket interior.


Next, the new interior goes on the same way the old one came out. Simply revers the order of removal. The socket interior we are putting in this socket is a three-way socket to use with either 3-way bulbs or standard on/off bulbs.


Remember to properly connect the wires, the smooth wire connects to the brass screw and the ribbed wire connects to the nickel screw. If you pulled any slack up the socket for the interior, you will need to pull it back down the lamp. The harp is squeezed band clips back in the harp base.


Viola!! Complete repair in < 10 minutes  and costs < $